
I’m playing catch up here with all of these posts, because we’ve been in our house for about 6 weeks now and running full speed ahead, so there aren’t many “in process” photos. Living in a construction zone with a toddler-a toddler who hears “no” and thinks that means “run faster towards that (reciprocating saw, impact wrench, bucket of screws, etc)”-is quite the challenge, or, to put it bluntly, pure hell.

The kitchen was one of the first items on our list. There were a lot of orange tones going on, which made it feel cramped. The appliances were new, and we painted the cabinets, so the only other items were new countertops and a backsplash, and removing the microwave to put a range hood in.
Before:
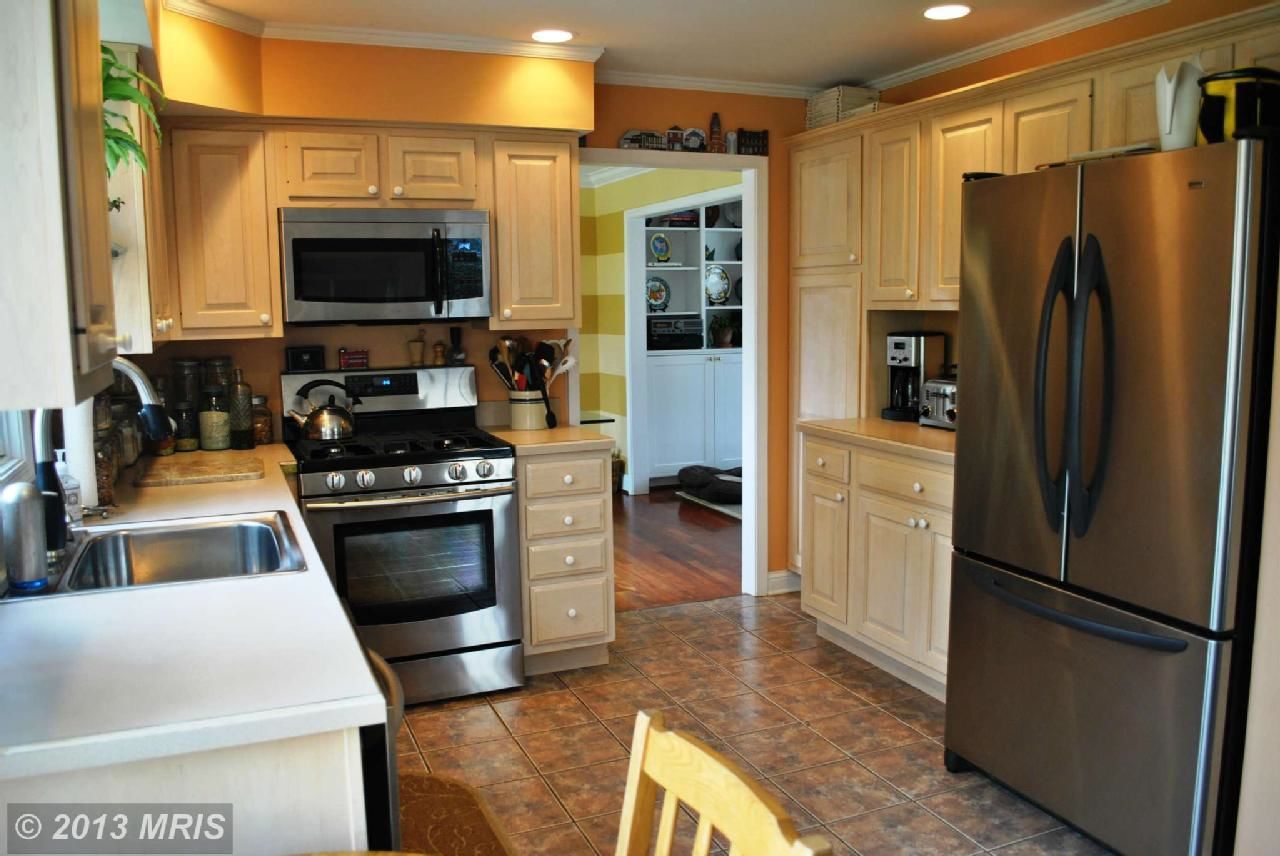

The backsplash will get its own post, tiling is not my specialty, but I did learn some tricks on this one. The countertops were a catastrophe. After researching DIY concrete countertops and pricing out granite (I’ve had a few people ask why I chose granite over Corian or Quartz, and quite honestly we were on a budget and granite is surprisingly the least expensive solid surface countertop out there), we found that DIY concrete would still cost us about $1,000, so it was worth it to get the granite and not lift the 80 pound bags of cement required for every 2 square feet.
Then the countertops came in, and long story short the installers cracked them along the sink, tried to cover it up, we saw it immediately, and after two weeks of them swearing we cracked them (in the 10 minutes they were in our house) and threatening to sue us because we cancelled the credit card charge with VISA, they ended up giving us an upgraded new slab for the price of the one we had originally picked. Thank God for highlights, because I definitely got a few gray hairs during that debacle.
The range hood was our other big project, the microwave wasn’t vented outside, so Jason had to run venting through the bulkhead to an exterior wall. Taking out a cabinet is pretty simple, just look for the screws and drill it out, and hanging the thing is no sweat, either. We ultimately decided to put a piece of 1×3 between the top of the vent and the bulkhead, to make it look more built in.
.JPG)
A note on painting the bulkhead-we didn’t want to remove it because it conceals ductwork, so initially I painted it the same color as the wall, but it stood out, so I repainted it Benjamin Moore White Dove in satin to match the cabinets. It blends in really nicely, I don’t even notice it anymore, and I loathe bulkheads.
So, for anyone who made it through that long and detailed post, here is our after:


Much brighter, right? I sealed the countertops after they were installed with Enrich N Seal. This stuff is great, put a coat on every six months, paint it on with a paintbrush, wipe off any excess after 5 minutes, and don’t use your countertops for 12 hours, I do it before bed. It only takes about 1/4 cup to seal the entire countertop and keeps any stains from setting in.

Tags : Uncategorized
